Pages

Friday, February 26, 2010

Late night experimentation and may we please win the hockey.

I had a choice, I could either sit there, and watch the bf play NHL on the PS3, watch him concentrate intensely on moving little men across the TV screen, listen to him swear as he is beaten by the 10 year old on the other side of the game, or I could go and play with my much neglected makeup collection.
hmmm...how hard of a decision was that?

Products used:
  • UDPP;
  • MAC Colour Forecast Crushed Metal Pigment Stack 1;
  • MAC Vanilla;
  • Estee Lauder More Than Mascara mascara
Directions:
  • Prime eyelids with UDPP;
  • Using a large paddle shaped fluff brush, such as the MAC 227, pat Pink pigment over the entire lid area up to your crease;
  • Using a smaller fluff brush, pat Rose pigment onto the middle third of eyelid; bring the colour slightly into the outer third of the eyelid.
  • Using a pencil brush, carefully apply Purple pigment onto crease and outer V;
  • Blend away any harsh lines with a fluffy blending brush.
  • Using a flat angled brush, apply Lilac pigment to inner corner and inner third of lower lash line;
  • Using a pencil brush, apply Purple pigment to outer third, and middle third of lower lash line
  • Highlight brow bone with Vanilla;
  • Curl lashes, and apply mascara.


These are the first pigments I've ever purchased from MAC. I've always shied away from loose shadows due to the whole mess factor, I caved this time cos of the cute packaging...epic fail T.T. Surprisingly, even though I didn't use mixing medium, there wasn't much fall out from these pigments. The only one that was not on par was the light lilac pigment, for some reason, it was much chunkier than the other pigments, applied unevenly, and had a lot of fall out. Should probably apply that one wet next time.

Products used:
  • UDPP;
  • Cargo Colour Eyeshadow Palette in Barcelona;
  • MAC Graphic Garden;
  • Random silver shadow from my 88 shimmer palette used as highlight;
  • Estee Lauder More Than Mascara mascara (btw don't you find this name kind of contradictory? if it's more than mascara why is it still called mascara?)
Directions:
  • Prime eyelids with UDPP;
  • Using a large paddle eyeshadow brush, apply violet shade to entire eyelid up to crease;
  • Using a fluffy brush, apply periwrinkle shade to middle third of lid;
  • Using a pencil brush, apply royal blue shade to outer third of lid;
  • Darken crease, and outer corner including upper lashline with Graphic Garden;
  • Apply a light silver shade to brow bone as highlighter;
  • Blend carefully with a fluffy blending brush;
  • Using a pencil brush apply Graphic Garden to outer half of the lower lash line, dip same pencil brush into the royal blue shade and apply on top of Graphic Garden;
  • Using a flat angled brush, apply periwrinkle shade to inner half of lower lash line;
  • Curl lashes and apply mascara.


This is the Cargo palette's debute, I bought it waaaay back when the brand was being phased out at Sephora. I still don't think any of the colours in the palette can be correctly described as "matte" in the traditional sense of the word, but they are definitely less shimmery than say...MAC's veluxe pearls? They also don't have the chalkiness often seen in matte shadows.
Quality wise, the pigmentation is little bit on the sheer side, and to achieve this level of intensity I had to really layer it on. I can't really comment on staying power as I jumped into the shower shortly after taking these photos. Must say, it took less effort to work with these shadows than with the pigments.
It's kind of sad that I have all these different colours which never really get see the light of day because on weekdays I'm too rushed for time to do anything this complex, and on weekends I pretty much just want to laze about at home.

p.s. Yes, I did put different coloured eyeshadows on each eye, wanna see?(omg I so need to get that lazy eye fixed!)
 

Looking back at these photos, I've noticed that I tend to not bring eyeshadows up past my crease. Why do I do that? It makes me look odd. I can only blame it as post traumatic stress from the time the MAC MUA applying BROWN eyeshadow all the way up to my eyebrow.
Oh well, the whole purpose of this blog was to put my mistakes out for the world to see so that everyone can laugh at me. I have no shame. Live and learn.
And we'll end the post with this:

Our father who art in Vancouver, hockey be thy name. 
Thy will be done, the gold will be won, on ice, as well as thy stands. 
Give us this day, Our hockey sticks, 
and forgive us our penalties as we forgive those who cross check against us. 
Lead us not into elimination, but deliver us to victory. 
In the name of the Canadian hockey team,
"AMEN"

Sorry Pavol, tonight I'm supporting Canada.

Wednesday, February 24, 2010

These are a few of my favourite things...

1. My Beauty Diary Black Pearl Masks
"How do I love thee? let me count the ways. I love thee to the depth and breadth and height my soul can reach when feeling out of sight."
Liz Browning didn't have these in her days, but if they did, I wonder how they'd compare to her feelings for Bob Browning?
Seriously, I LOVE these. I'm on my upteenth box, they're dirt cheap, they're convenient and most importantly, they work.
Long time readers will recall the 10 day challenge that I did with these masks. For ease of reference, here are the photos from the challenge:

BEFORE: Dehydration, uneven skin tone, dullness, enlarged pores, redness, you name it I had it. My skin has pretty much been like this for as long as I remember, it's never been problem free, and the combination of indoor heat and freezing weather probably exacerbated it.  I also scar really easily, so pimples usually leave behind a nice dark mark, which would be around long after it has healed.

AFTER: This is the closest to PERFECT skin I've ever been. I can actually go out without makeup, and children will not run from me screaming.  The redness and swelling are gone, my skin tone has evened out, and  my skin is also brighter and noticeably more plumped up than before. Scars from old break outs have also lightened considerably.
I've been using these masks on a regular basis for about 4 months now, and I've gone from a MAC NC25 to a NC20, so there is definitely some whitening effect to them.
I now use these masks about 2-3 nights a week, I'll wash my face as usual, slap the mask on, read a book for an hour, take it off, rub the excess serum into my face and then moisturise as usual. In the morning I'll wake up with baby skin.
The Beauty Diary Mask range is huge, however, the majority of their ingredients are the same, and would thus probably give the same effect. My own personal preference is for the the black pearl or the pearl powder ones as I feel they are more saturated with serum than say, the Bulgarian rose one, which dries up around the 10-15 min mark on my face. The apple one did sting my skin a tiny bit, apparently that means the AHA is working, but I find that it didn't give me any extra results that the black pearl wasn't giving me. My olfactory nerves did not agree with the Red Wine or the Sake ones, it reminds me of how I'd smell once the exams were out back in university.
I'm currently taking the premium masks for a test drive, I'll update on those soon. Also at some point, I'll take a photo of the current condition of my skin, just so you can see if there's been further improvements after prolonged use of the masks. I can't do that right now because the Pooker's mum has run off to the Olympics with our camera xD.
Btw, I have since noticed that the Black Pearl masks seem to be disappearing off the shelf faster than any of the other varieties. If any of you is the culprit, please refer to my 1st paragraph, and stop buying my stuffs. It'll make you ugly. xD
 
Damage: CAN$10.99 - CAN$19.99 for a box of 10
What would Kanye say?: "One of the best masks of all time"

2. The Body Shop Vitamin E Intense Moisture Cream and Nourishing Night Cream
Vitamin E Intense Moisturizer - Vitamin EVitamin E Nourishing Night Cream - Vitamin E
One day, during an "omg I've run out of moisturiser and I forgot to buy any!!" moment, I found a sample tub of The Body Shop's Vitamin E Intense Moisture cream that I'd received as a GWP and subsequently forgot about. In my desperation, I put it on, not expecting much, after all, I've tried their tea tree oil range before...
My skin practically sang hallelujah when I put it on.
It felt like I was rubbing...pure silky moisture onto my skin (omg so cliched!). My skin gets itchy, dry and flaky in the winter months, this cream left me with soft, completely moisturised skin. That moisturised feeling lasts all day even when I'm huddled next to the heater whimpering from the cold. It doesn't leave a greasy film, nor has it broken me out or clogged my pores.
Their website says that it contains organic olive oil, shea butter and vitamin E wheat germ oil, what do I know, I did law. I'll leave it up to people like Russianfortunecookie to figure out the chemical side of these things. I do know that it contains Dimethicone and Cyclomethicone, which gives it that silky feeling and gel-like consistency, therefore people who are allergic to, or dislike silicone in their skincare products should probably skip this one. However, if you're friends with silicone, it means that this cream can double as a primer for foundation.
I use this in the morning after the Vitamin E serum, which I like but is not really a life changer.
I was so impressed with the day cream I went out n got me a tub of the night cream. The night cream is a lot richer and denser than the day cream. It's quick thick in the tub, probably as a result of the cocoa butter, but really melts once it's on your face. I am an absolute grease ball, but with this cream, I wake up with no visible oil on my face, it just feels soft and moisturised.

Damage: $20 for the intense moisture cream and $16 for the night cream
What would Chuck Norris say?: "Chuck Norris destroyed the periodic table because he only recognises the element of surprise"

3. Vichy Normaderm Anti-Blemish Intensive Treatment Cream
Normaderm Anti-Blemish Intensive Treatment Cream - Moisturizers
This is honestly the only spot treatment I've tried that delivers noticeable results overnight. It contains 2% Salicylic Acid, and on top of controlling the breakout it also speeds up the healing process. I feel that the majority of acne treatments on the market are too strong, they actually burn your skin and that's why often times you're left with a dark mark where the spot used to be. The Vichy cream, on the other hand, is quite mild, but really does its job MINUS the dryness and dark marks that you'll get from other acne treatments. In my own use, I've found that if I catch the spot early enough in it's development, and put this on immediately, by the next day the skin will be flat again with little or no redness. If it's already a full blown mofo with it's own shadow n everything, applying this cream twice a day (it can be used under makeup with NO pilling!!!!), gives you less inflammation and redness in approx 2-3hours and total control within a day. By the 2nd day it should start healing, and you can use it less often and start using things like face masks to fade and heal the leftovers.
I know that it seems to be rather pricey for such a small amount but honestly it'll last you for frikken ever. It has a narrow, almost pin point opening, which allows you squeeze out a tiny amount just enough to pat onto the pimple.

Damage: CAN$14-$20 wait for the 3 for 2 specials!
What would Vichy say?: "Mario Badesco can bite my blue ass."

4. Lush Angels on Bare Skin
 
A cult item that needs no introduction. I braved the smell of the Lush store that threatened to assimilate me into part of the Borg Lush collective. Resistance was indeed futile. Omg, ok I promise! no more Star Trek references!!!
I'd bought this on Temptalia's and the Muse's rave reviews, I proceeded to use it every day, and to my disgust it broke me out in a mass of white heads. I then banished it to the naughty corner of the bottomest drawer. However, as is the nature of things like this, I subsequently took it back out for round two, this time I used it only once a week. Success!!! no break out!!! just gorgeous, soft, smooth skin!!!
It contains ground almonds and kaolin clay, together they buff away all dead skin, lumps n bumps on your face, suck out all the muck from ur pores, and leaves your skin heavenly smoooooooth xD It's not a foaming cleanser, it's more of an exfoliator or scrub, however, unlike other scrubs, it doesn't leave your face taunt and dry. Actually, it almost feels like it leaves an oily film on your face, but once you dry your face off, all you'll feel is soft, smooth, skin that almost feels like you've applied moisturiser to it!
I now use this twice a week, it has not broken me out again, I've had less break outs, and on the days that I use it, I definitely notice my foundation going on MUCH smoother.
It IS a bit messy to use because, you have to break off a piece from the roll, and mix it with a bit of water to form a paste before you can apply it to your face. Also I'll recommend using this in the shower as bits of crushed almond and lavender seeds DO tend to get into your hair when you rinse, however, the results are just SO worth the extra schlep.
I believe Lush gives out quite generous samples at their free standing stores, so if you're curious, do try it out!

Damage: $10.50 per 100g
What would Robbie say: "So when I'm lying in my bed, thoughts running through my head, and I feel that love is dead, I'm loving angels instead."

So those are a few of my favourite things, what are yours? Do tell me, as I'm always on the look out for new things to love xD.

Sunday, February 21, 2010

The Olympic Issue and Valentine's love pack.

The Olympics are in town!!! here at MACnunu headquarters, we're really excited as neither of us have experienced such a large international event in our hometown before. Yeah, so the people of BC will probably be paying for it for the next 30 years, but since it's already here let's support the athletes, and enjoy it!
I joined the crowd in welcoming the torch to the city:

The Olympic Cauldron:
Can't see much? eh...we couldn't either...it's apparently one of the controversies surrounding the Olympics; people have been complaining that there isn't a decent place to take a photo of the cauldron. You can't see it in this photo, but there's a iron fence around the cauldron and people are saying that it gives the cauldron an "imprison" look.

The queue to get into the Sochi House:
Sochi, Russia is where the next winter Olympics is scheduled to take place. We literally lined up for over 1hour to get inside so we could...watch a Russian vampire movie...
T.T
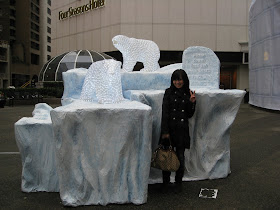
Skip unless you have the patience of a saint, and time to burn. There's really nothing inside, other than a big screen TV, a bar, and Ovechkin's hockey jersey. Oh, and a couple of Russian girls. We did manage to take this rather spectacular photo though.

People built these little Olympic figurines alone the beach, how in the world did they get them to stay up??!! And what exactly is the etiquette for jacking stones from your neighbour's figurine??...

People everywhere:

We went into Chinatown to have Pho for lunch. It was meh =.="

We discovered that there was an open air food market just a couple of blocks away AFTER this... It's ok, we went back at night xD

Standing behind the Olympics news broadcasting booth, waiting for a chance to make an arse of myself:

Of course I can't give up the opportunity to throw a fob sign:

There was this crazy dude there juggling on a unicycle with just his doondies on:
Please remember this is on a winter's day...

Hand painted paper lamps:

Taken from Granville Island:

Celebrating in the streets after Canada's 8-0 win over Norway:

Canadians are serious about their hockey:

Here I am hooking up to the Tree of Voices...oops wrong reality xD it's actually the Bell Ice Cube:

The Pooker also got the opportunity to go watch Curling live. It's a sport which he now pretends to understand after watching for 3 hours.

I was more interested in THIS curling game!

$5 lamb curry. Told you we went back to the food market. Was pretty good actually...

Curry fishballs:


Fish Siu Mai: - haha, these were being sold by this white guy who was hawking it out for the shop's Chinese owners xD

And to round off my night, I come home to this:
Miss. Pink's Valentine's day love pack. I gobbled up the cookies already, omg they are sooooo goooooood! Thank you very much for thinking of me! I'm quite a fan girl of Miss. Pink, so I'm never gonna wash my hands again.
Bitch didn't leave a return address, now I'm gonna take it as a personal challenge to find out her address.
What a pic heavy post!! Expect another Olympic related post some time this week!

Saturday, February 13, 2010

Quick 'n dirty Valentine's look.

I hate Valentine's Day. Seriously, my best friend and I used to sit there and watch horror movie reruns on Valentine's day. Our ideal Valentine's date was Freddy Kruger xD


The Pook, however, insists on celebrating Valentine's day >_> I got him to compromise after last year's dinner disaster, and since this year's February 14th also happens to be Lunar/Chinese New Year, there's even more excuse to stay at home xD.
This one is for you ladies who will be dolling up. A pink based look, keeping it simple and sweet.


Products used:

  • MAC Fafi Eyes Quad 1 
  • MAC Mineralised Skin Finish in Light Medium
  • L'Oreal Lineur Intense liquid liner in Black
  • NYX eye/eyebrown pencil in Dark Brown
  • MAC lipstick in Myself
  • Daiso lashes the criss cross kind
  • The Body Shop blush in Roseflower
  • Formula D concealer (Thanks Dao!!)
Not pictured: Estee Lauder More Than Mascara mascara; The Body Shop Matte & Prime; Urban Decay Primer Potion in Sin; MAC Studio Sculpt foundation in NC20.

Directions:
  • Prime skin, apply foundation, conceal if necessary and set foundation with MAC MSF;
  • Prime eyelids with UDPP;
  • Line a winged cat eye;
  • Curl natural lashes, and apply false lashes;
  • Fill in brows;
  • Using a flat brush, pat Hey! (golden beige pearl) over the entire lid area up to your crease;
  • Using a pencil brush, apply Pink Venus (pink shimmer) onto crease and bring down into outer corner;
  • Highlight highest point under brow with Vanilla (off white matte);
  • Using a fluffy brush, lightly blend the edges of the shadows using an upward motion;
  • Line outer1/2 of lower lash line with a dark brown pencil;
  • Apply mascara to lower lashes only;
  • Apply Roseflower blush (light pink) to apples of cheeks;
  • Apply Myself, or a similar "My Lips But Better" lippy.
Close up:


In warmer lighting


Hope you girls have a fabby Vday!!! Mwah!

Sunday, February 7, 2010

A belated makeup post...

It's about bloody time I did a FOTD.
I know I'd previously said that I'm paranoid about posting my mug up on the internet, but since this blog has nothing to do with my work, I don't think anyone would have a problem with it *shrugs*.
It was a miserable day of rain and I really wanted to do a summer look!

Go from this:

To this: (btw why does my head look disjointed?)

Using these:

  • MAC MSF Natural in Light Medium
  • Dior Shimmer powder in Rose Diamond
  • MAC Fafi Eyes Quad 1 (I only used the gray shade to draw in my brows...yeah I'm ghetto like that)
  • Urban Decay Get Baked quad (I <3 u Sooji!)
  • MAC Shape & Sculpt in Lightsweep & Shadester
  • MAC mineralise blush in Nuance
  • NYX eye/eyebrow pencil in Black
  • MAC lipstick in Hue
  • MAC lipglass in Underage
  • Shisem lashes XOG (Mwah Sooji)
Not pictured: MAC studio fix fluid in NC20; Estee Lauder More than Mascara mascara; The Body Shop Prime & Matte; UDPP in Sin.

Directions:
  • Prime skin, apply foundation and set foundation using MAC MSF.
  • Line eyes, curl natural lashes, apply eyeliner and false lashes (I always mess up when I apply falsies, so I need to apply them before applying any other eye makeup xD. Tsk tsk I'm such a sorry excuse for a beauty blogger. Btw...ALIENMAN WHERE IS MY FALSIE TUTORIAL?!?)
  • Cover any visible eyelash glue with eyeliner.
  • Apply eyeshadow primer.
  • Apply Half Baked to inner lid, Baked to outer lid and Twice Baked to outer V and crease. Blend away any harsh lines using a fluffy blending brush.
  • Using an angled liner brush, apply Flipside to your lower lash line and water line.
  • As a last thought I applied MAC Vanilla to my brow bone as a highlighter xD
  • Apply mascara to lower lashes only.
  • Suck in your cheeks, make a fish face and apply the darker shade of the Shape & Sculpt duo to the hollows areas on your cheek to contour. Blend up, down and out using fluffy face brush.
  • Apply Nuance to apples of cheeks, sweep upwards towards temples.
  • Highlight cheeks using Rose Diamond.
  • Apply Hue lipstick and Underage gloss on top!
Ok...I can kinda see why my mom told me to go get a nose job...

Maybe I should get that laser peel while I'm at it... Hahahaha! and check out that horrendous falsie job!

And once more for the cam whore in me!

While I was taking these photos, people walking by outside our house were giving me weird looks...they were probably thinking "look at this vain girl taking photos of herself" T.T
I need a "Blogging in progress" sign!

BTW..

Yes!!! Alice is finally mine!!!! The Pookie got it as part of my "Not a Valentines gift gift" lol. He even put himself on Sephora's waiting list for it xD.
Awwwww!
I lub you!
Now the question is, what do I get him? @.@

Nunu's Kitchen - Fusilli pasta with ham & mushroom cream sauce

Food I make!


After all that ranting, it's time for some yummies for my tummy. No witty opening paragraph. This was just something I made for dinner the other night to eat with the Borscht I'd made earlier. I was originally just gonna do a simple pesto sauce but then I found ham and mushrooms in the fridge...

Fusilli Pasta with Ham & Mushroom cream sauce for two

You will need:

  • Fusilli pasta
  • 2-3 slices of cooked ham - thinly sliced;
  • 2-3 medium portabello mushrooms - sliced;
  • Approx 2 tbsp Flour;
  • Approx 2 tbsp Milk;
  • 1 stick of butter;
  • 1 handful cheese of your choice;
  • 1 clove Garlic - chopped;
  • 2 tsp basil paste/pesto sauce
  • Approx 1.5 tbsp chicken broth;
  • Salt & pepper;

La Methode:
  • Cook and drain pasta. Remember to mix some olive oil into the drained pasta so that it doesn't stick together.
  • Using half the butter, saute together the mushroom, ham and garlic. Set aside.
  • All cream style pasta sauces start with a roux, a mixture of melted butter, flour, and milk, also known simply as "white sauce". To make your roux, turn heat to lowest setting, and melt the remaining butter in your pan. Once butter is melted, add your flour a little at a time, stir furiously.
  • To your butter and flour mixture, slowly add the milk and chicken broth. It should look like this:
  • Add your cheese to the roux. If the sauce looks too runny, add some more flour, if the sauce is too thick add some more milk. 
  • Add the sauted ham and mushrooms to your roux.
  • Add basil paste or pesto sauce.
  • Add salt and pepper to taste.
  • Add drained pasta to pan and mix throughly with the sauce.
  • Sprinkle with Parmesan if desired.
  • Eat.